

Websites are the front page of your business. As you build out your website, you have a lot of options for ingesting, tracking and storing your user data. For this exercise, I decided to leverage a customer data platform rather than building direct API integrations.
I took this approach for the following reasons:
- Unification of User Data: Using a customer data platform allows you to collect and unify website, salesforce and other user data into a single platform.
- Integration Flexibility: Most CDP platforms come with a library of out-of-the-box integrations and the ability to build custom integrations. This allows you to centralize nearly all of your integrations - minimizing the overhead it takes to build, maintain and document all of your bespoke connection points.
- Data Activation: Related to the integration flexibility point stated above, CDPs generally allow faster speed-to-market because you can quickly action on your data in the various platforms you decide to integrate with.
What tools are we using?
- Salesforce Leads: I’m going to be using Salesforce Leads for storing user responses to my contact us form.
- Webflow: Webflow is my CMS, we’ll be walking through how to apply this to my Webflow forms.
- Segment: Segment is my preferred customer data platform due to its robust feature set and focus on marketing capabilities - I’ll be using their Connections product to track and send users from my website to Salesforce. Using Segment also helps unlock future use cases for my data.
Step 1: Implement Analytics.js on your website
Analytics.js is an open-source client-side JavaScript library developed by Segment. This library allows us to track user data collected on our website to various destinations (Salesforce, AdRoll, Meta, etc.) without needing to build brand new endpoints or integrations every time.
In Segment, go to Connections > Add a Source > Search for and select “Javascript” > Enter the details below:

Once you add your source, copy the Segment snippet that appears in the next step.
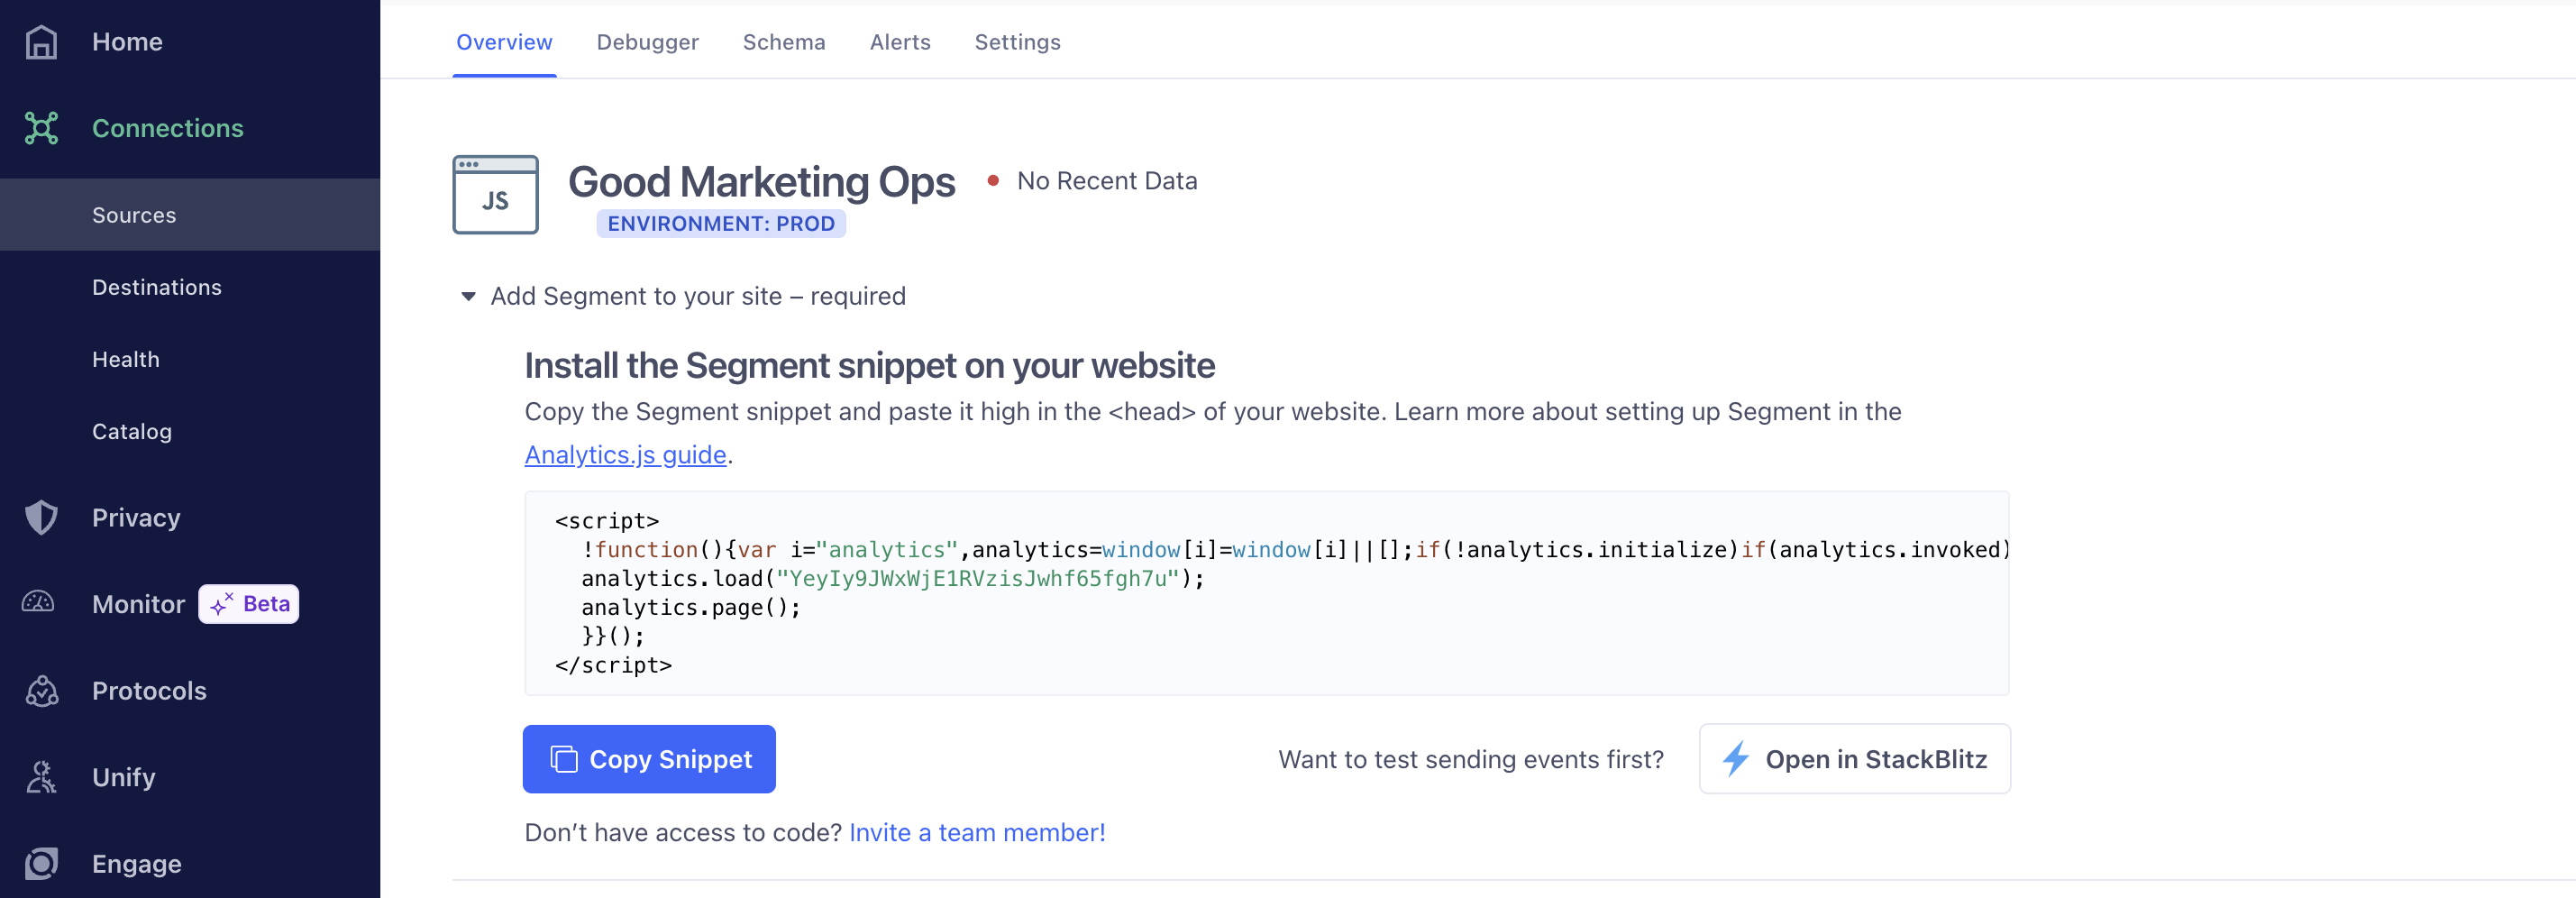
Go to Webflow > Site Settings > Add the Segment snippet to the top of your Head code

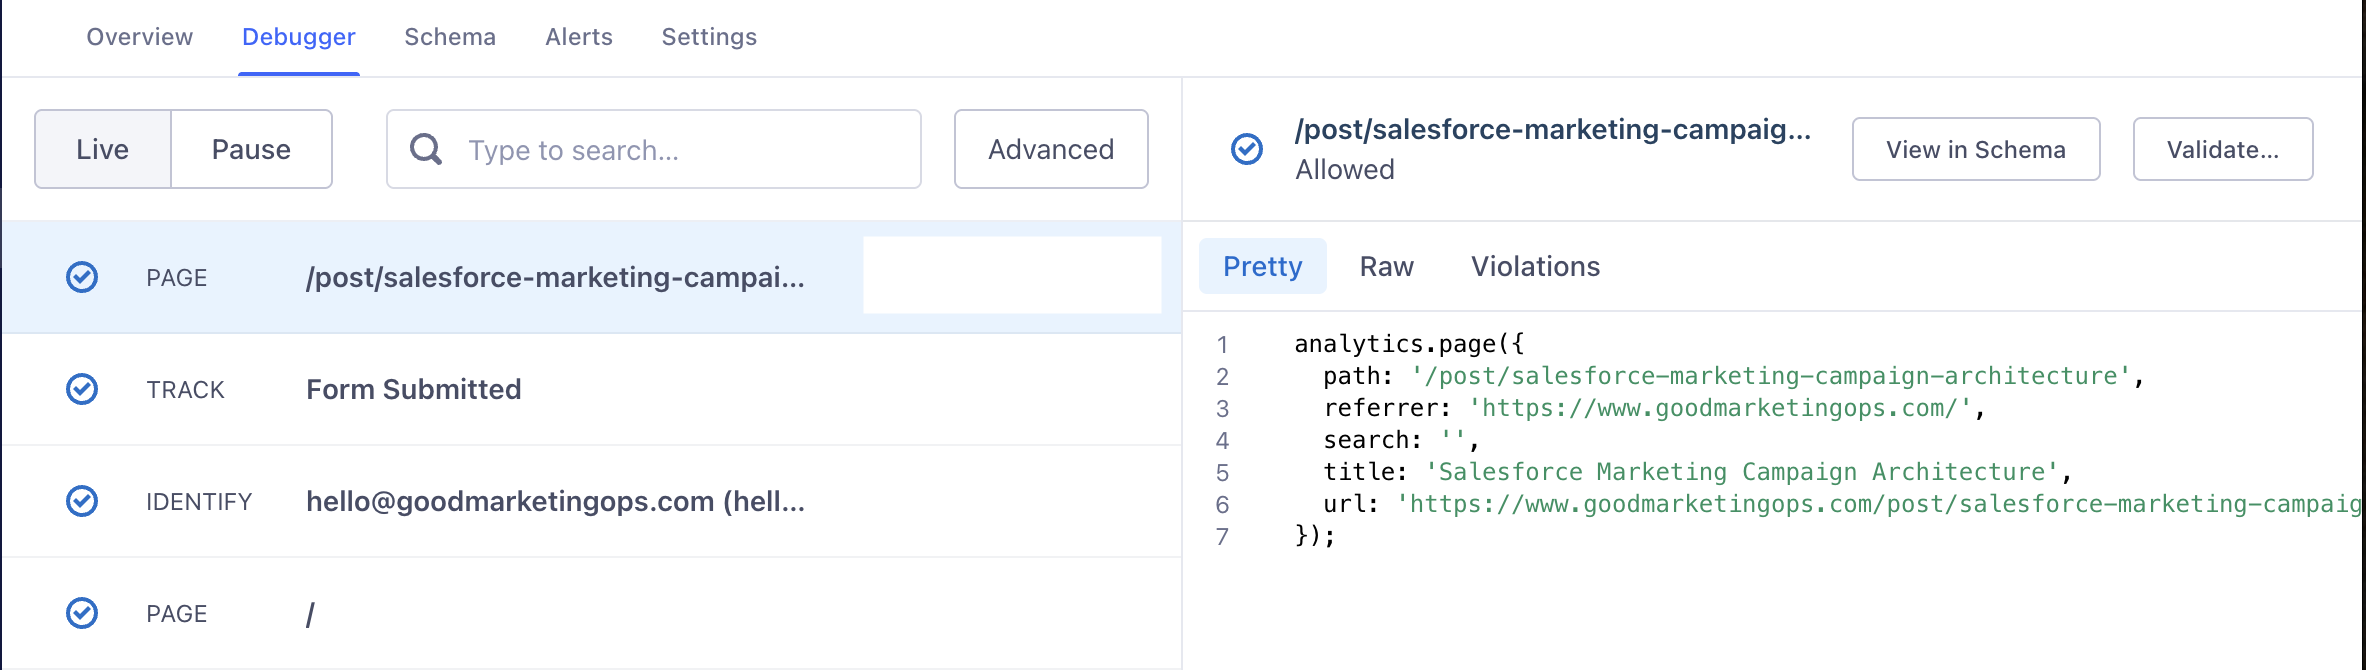
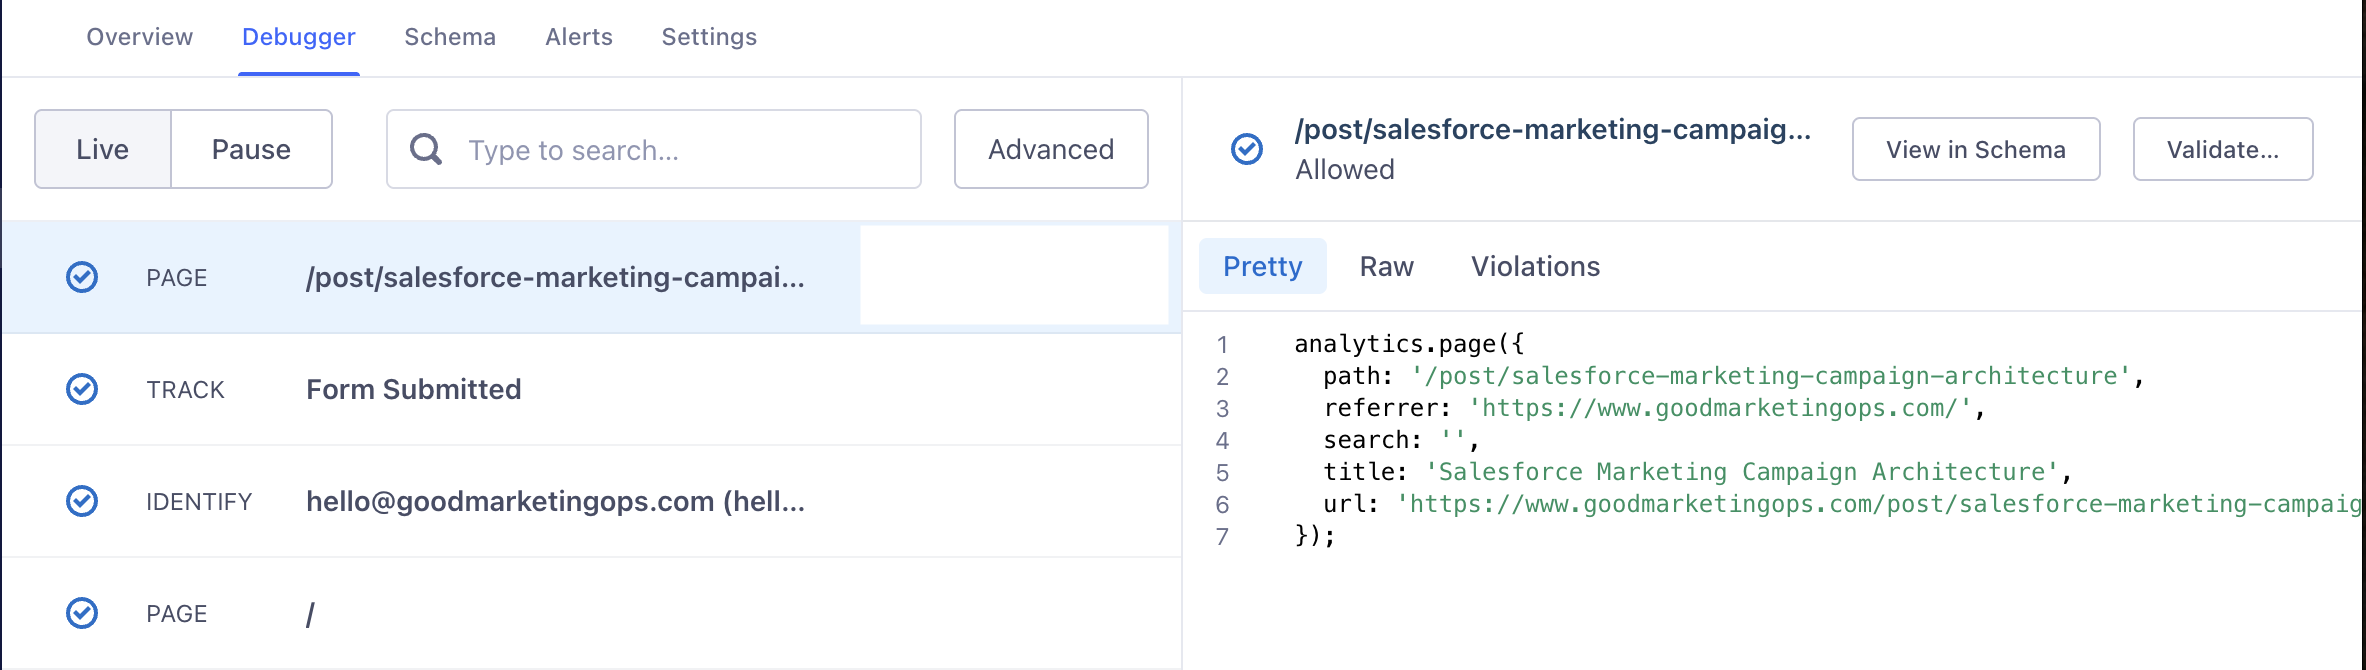
Step 2: Verify Analytics.js is tracking events on your website
At this point, you should start seeing events show up in the Debugger for your new source.
Step 3: Implement Form Tracking in Webflow
These next steps are going to be implementing identify and track calls on your website. This will allow you to capture the form submission event, extract identifying user information and call analytics.identify() with that data. Additionally, I’m implementing a form submission Track event.
Generate your identify and track code in ChatGPT
I asked ChatGPT to come up with the identify and track code needed for my website. With a few modifications to align with my form and field ids, here is what the code snippet looks like (with logging):
<script>
  document.addEventListener('DOMContentLoaded', function () {
    console.log('DOM fully loaded');

    const form = document.getElementById('Home-Contact');
    console.log('Form element:', form);

    if (form) {
      form.addEventListener('submit', function (e) {
        console.log('Form submitted');

        const firstName = form.querySelector('input[name="firstName"]').value;
        const lastName = form.querySelector('input[name="lastName"]').value;
        const email = form.querySelector('input[name="email"]').value;
        const company = form.querySelector('input[name="company"]').value;
        const formMessage = form.querySelector('textarea[name="formMessage"]').value;

        console.log('Collected values:', { firstName, lastName, email, company, formMessage });

        if (typeof analytics !== 'undefined') {
          analytics.identify(email, {
            firstName,
            lastName,
            email,
            company
          });

          analytics.track('Form Submitted', {
            formId: 'Home-Contact',
            firstName,
            lastName,
            email,
            company,
            formMessage
          });

          console.log('Segment events sent');
        } else {
          console.warn('Segment analytics not loaded');
        }
      });
    }
  });
</script>
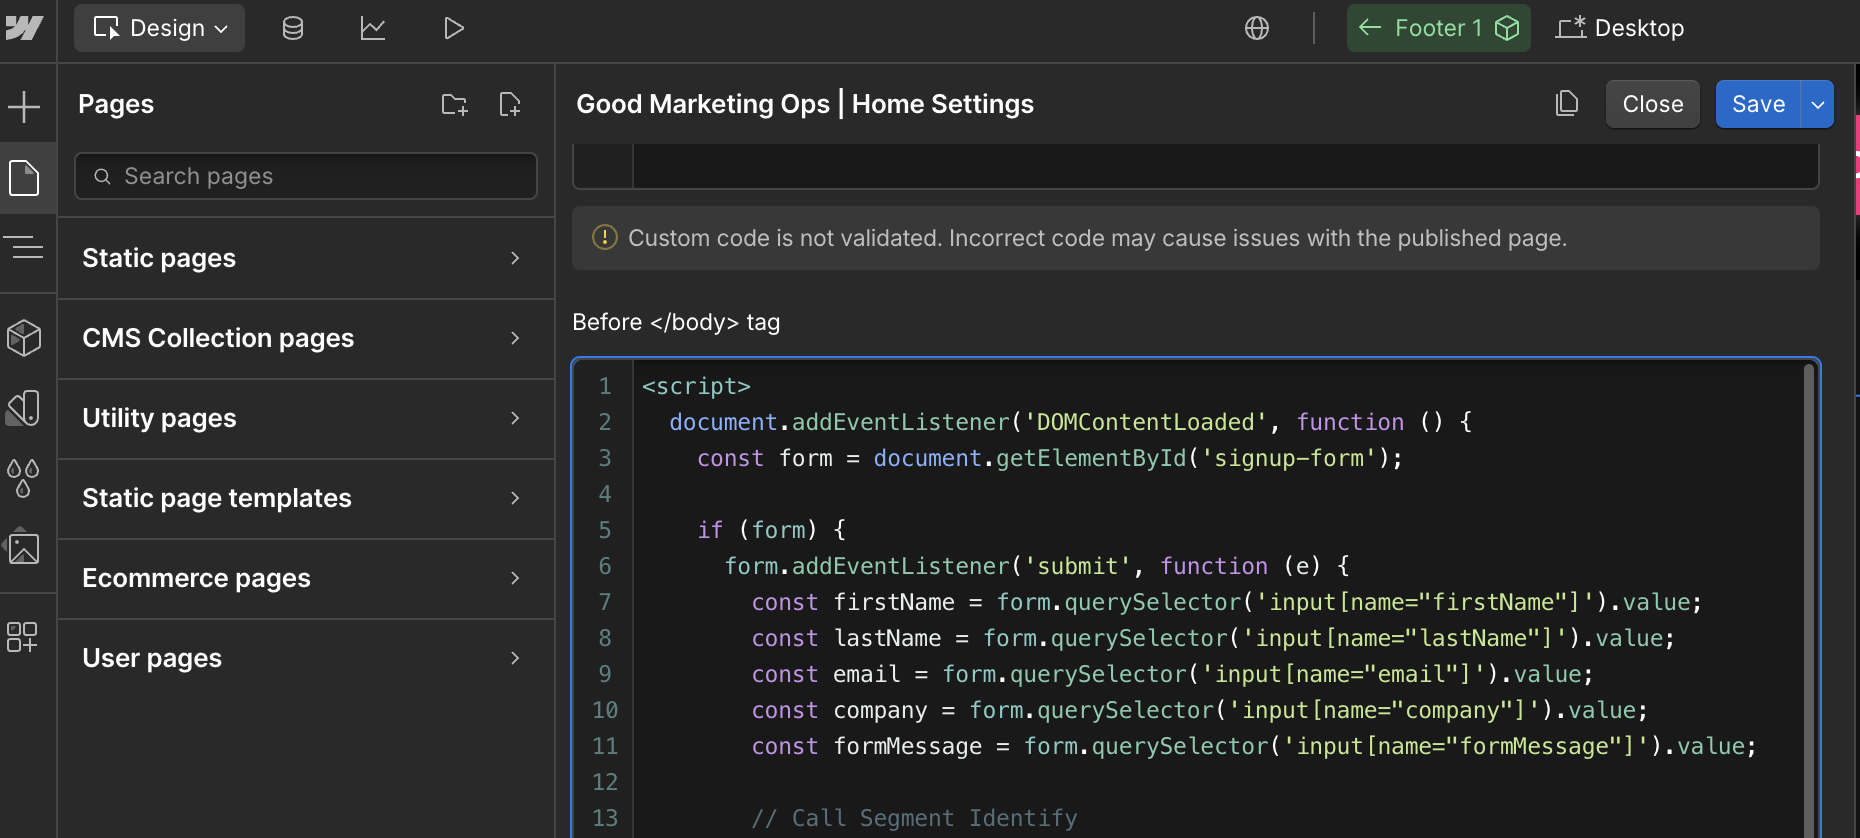
Implement the identify and track code in Webflow
In Webflow, open up the the page settings for the page that your form lives on. If you scroll to the very end of those settings, you can paste your code into the “Before </body> tag” section.
Confirm Segment is receiving events
This is what success will look like on the Segment side - you’ll have identify, track and page events all appearing in the debugger.
Step 4: Configure Salesforce (Actions) as a Destination in Segment
In Segment, go to Connections > Add a Destination > Search for and select “Salesforce (Actions)” > Follow the prompts to login to either Salesforce production or dev.
Define event trigger
This allows us to define what events we’re going to push to Salesforce - I’m pushing any Form Submitted events.

Define Mappings
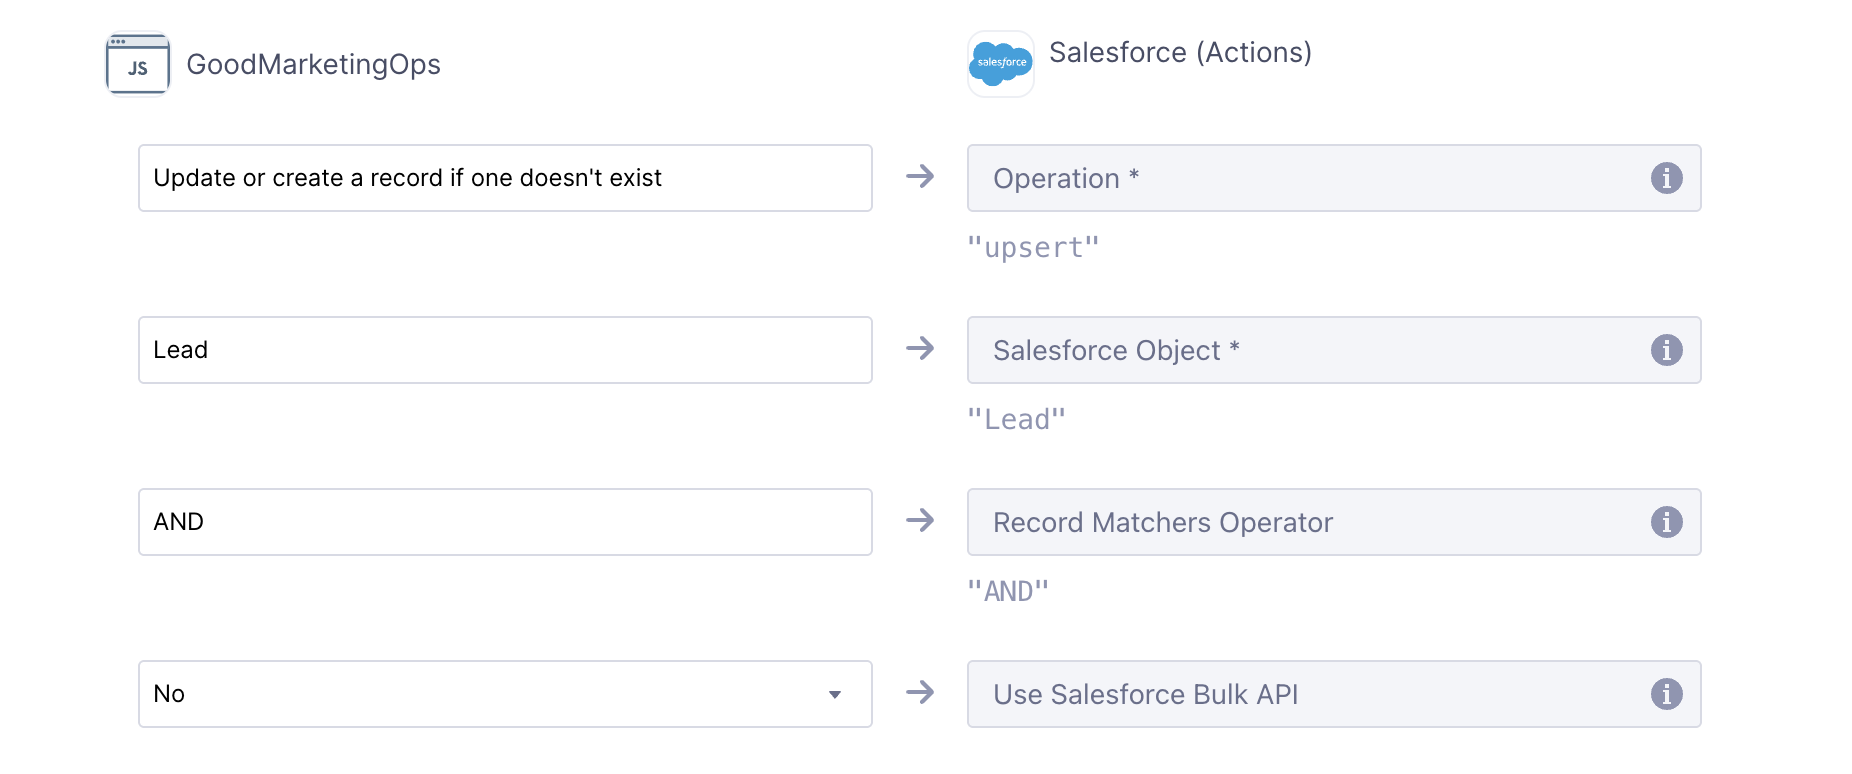
The first group of fields in the mappings section determines the following:
- Operation: What is the action you want to take for users that have submitted a form? Create, Update, Upsert or Delete. I have chosen to upsert records.
- Salesforce Object: Which object will you be upserting records to?
- Record Matchers Operator: If you have multiple lines of matching logic, you can choose AND/OR logic.
- Use Salesforce Bulk API: From Segment’s documentation “If true, events are sent to Salesforce’s Bulk API 2.0 rather than their streaming REST API. Once enabled, Segment will collect events into batches of 5000 before sending to Salesforce.”
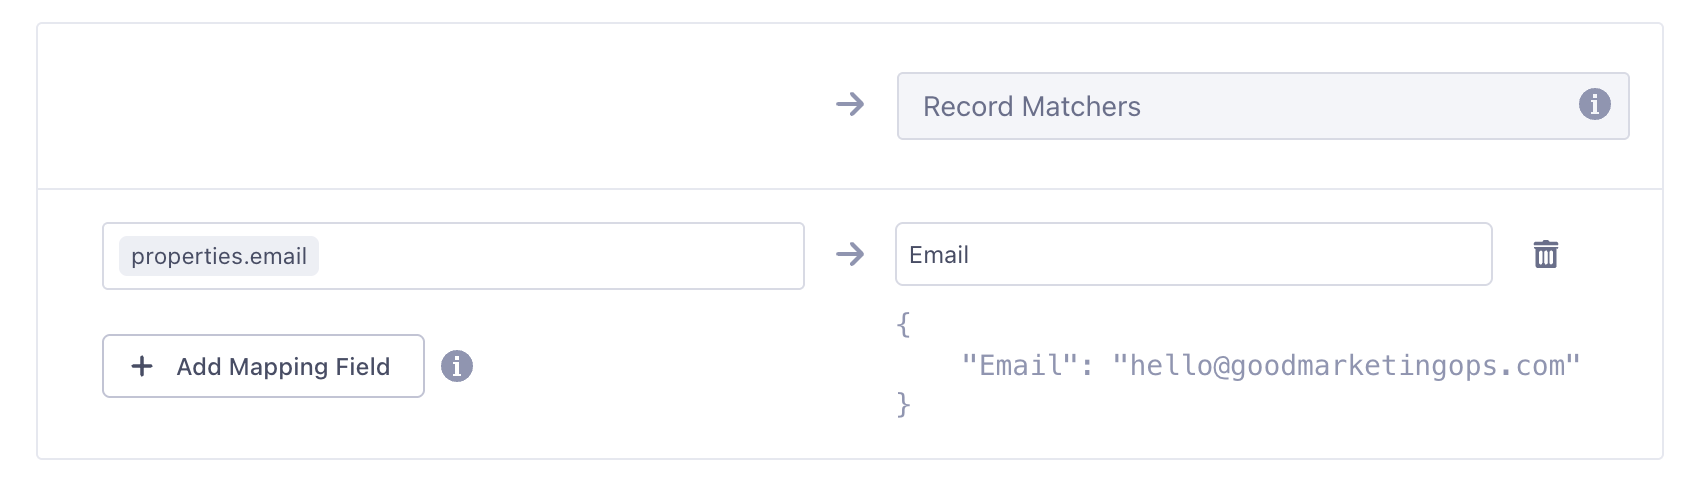
The next mapping group allows you to define how you will match records to Salesforce leads. I have chosen to only use email as my identifier.
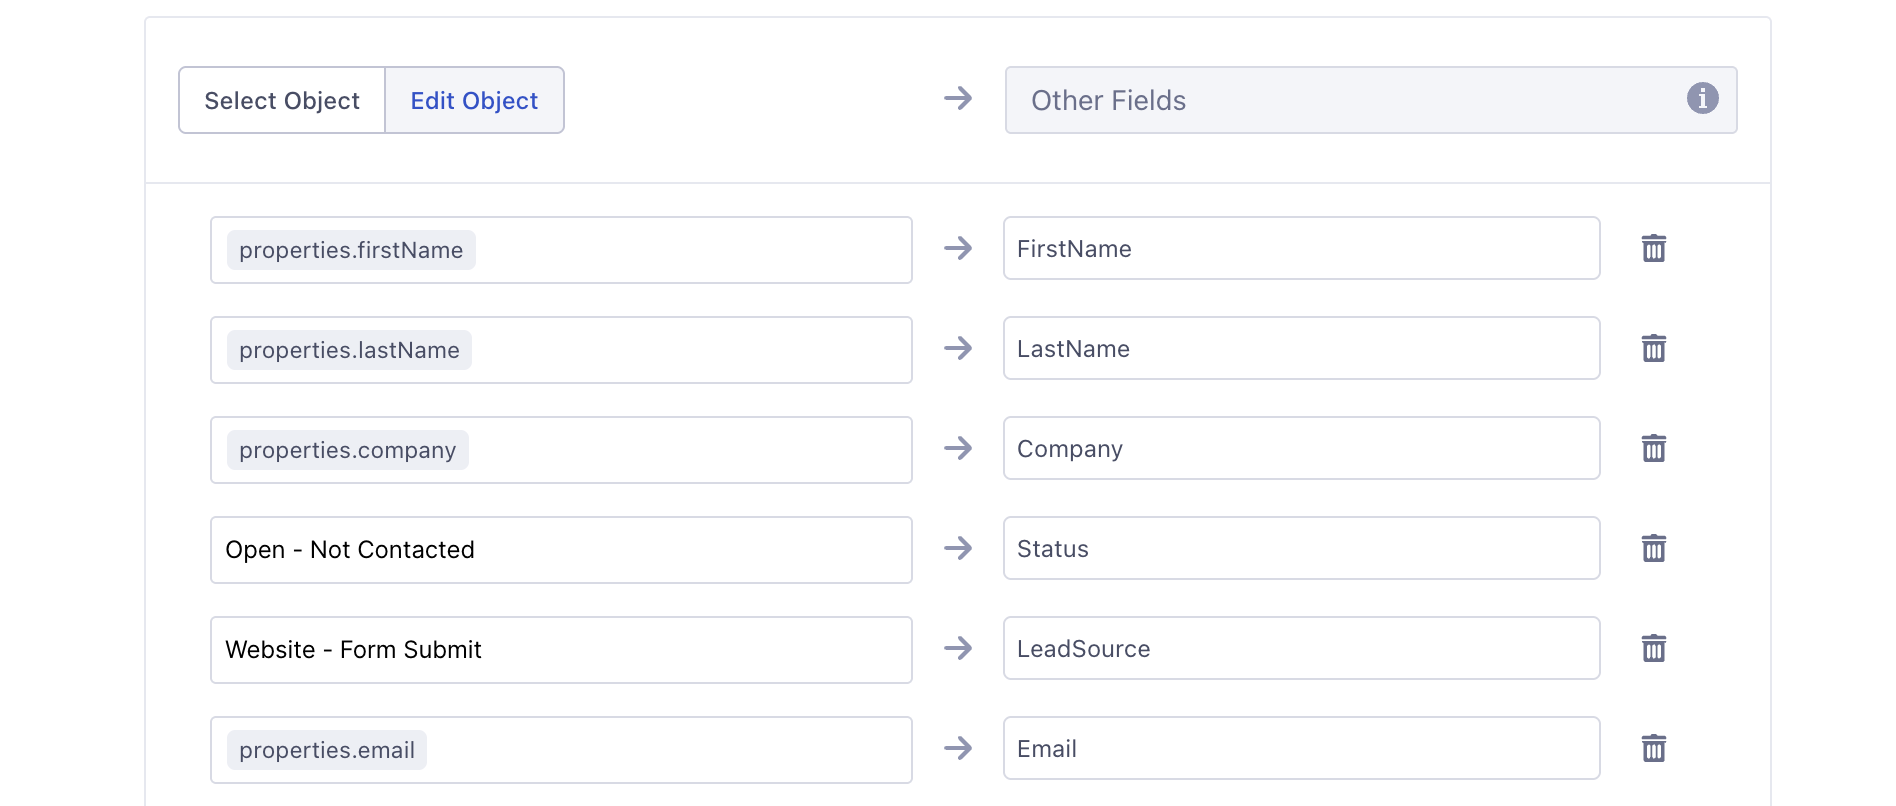
The next set of mappings will allow you to map the data collected from your Form Submitted event to the Salesforce lead record. Ensure the column on the right aligns exactly with the Field Name in Salesforce.
Once you’ve completed your mappings, scroll to the bottom of the page and send a test event. That test event should result in a created or updated lead record in Salesforce!
